How to Tie an Improved Clinch Knot
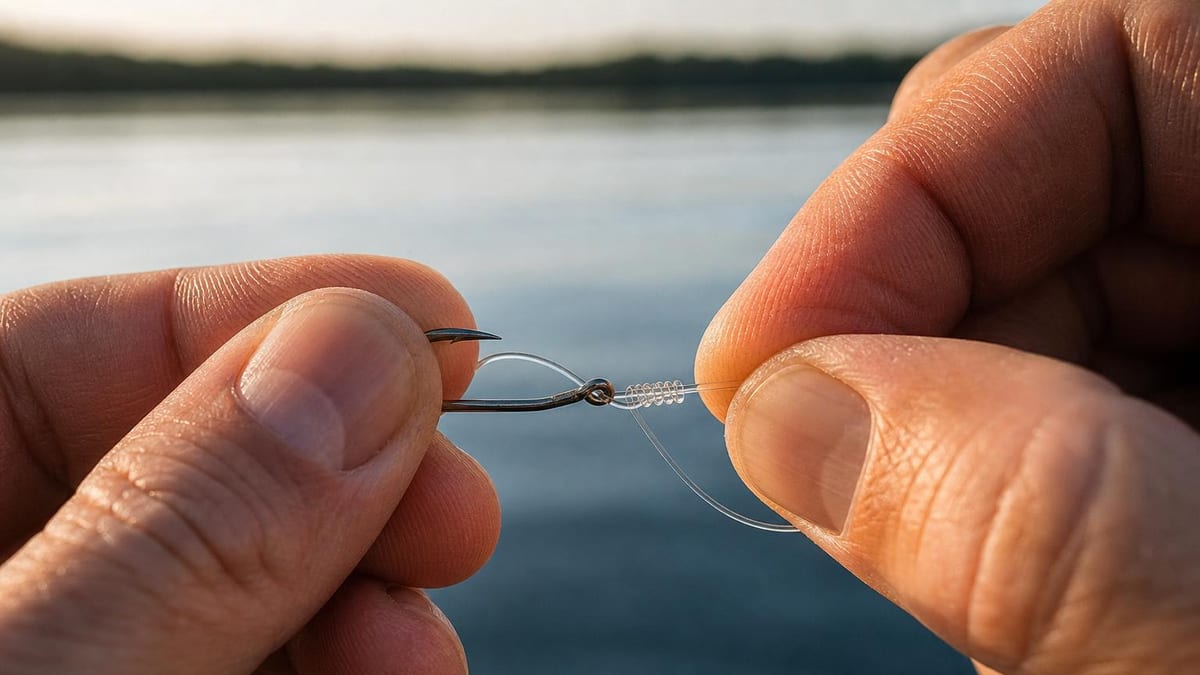
To tie an improved clinch knot, pass the tag end through the hook eye, wrap it five times around the standing line, bring the tag back through the small loop next to the eye, then through the big loop you just created, and moisten before pulling tight. The second pass is the 'improvement' — it locks the tag so the knot cannot slip back through.
Key takeaways
- Five steps: through the eye, five wraps, back through the small loop, through the big loop, moisten and seat.
- The second tuck is what makes it 'improved' — the tag is trapped under load instead of being free to slip.
- Five wraps is the standard for common line weights; too few slip, too many prevent proper seating.
- Always moisten before tightening — drawing any knot dry generates friction heat that damages line.
- It shines with monofilament and fluorocarbon; slick braided line is where it is weakest — use a Palomar or uni there.
- Pull the standing line, not the tag, to seat the wraps into a neat spiral against the eye.
How to tie it, step by step
- Type Terminal knot
- Difficulty Easy
- Best for Mono and fluoro to hooks, lures and swivels
-
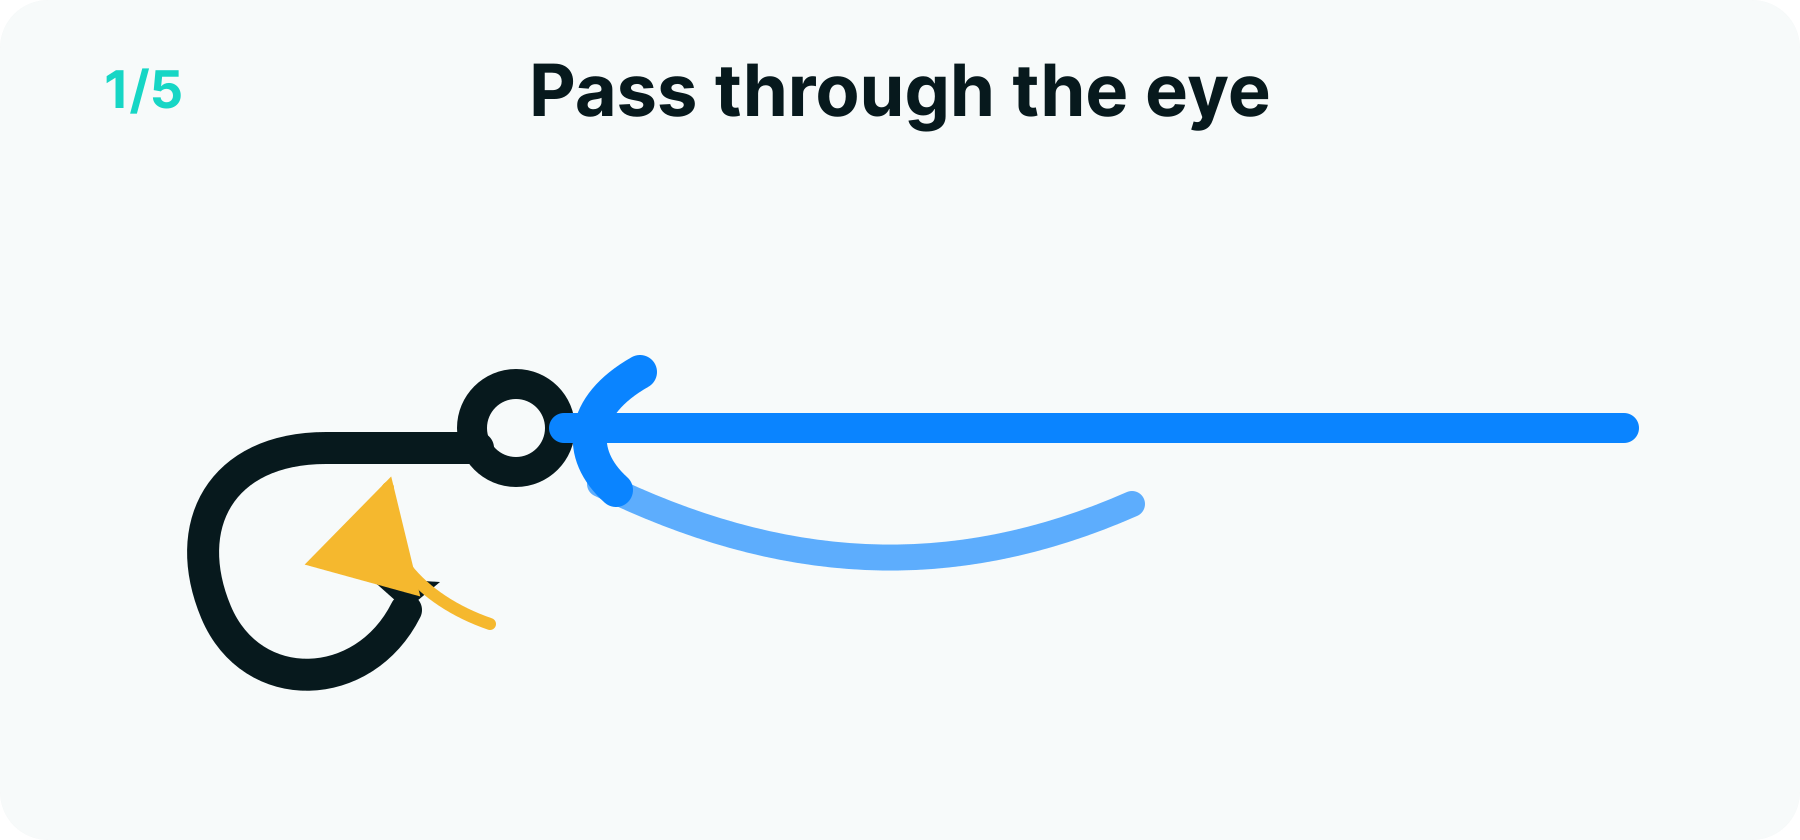 Step 1 of 5
Pass through the eye
Feed the tag end through the hook, lure or swivel eye and pull through six to eight inches of working line — enough to make every wrap without running short.
-
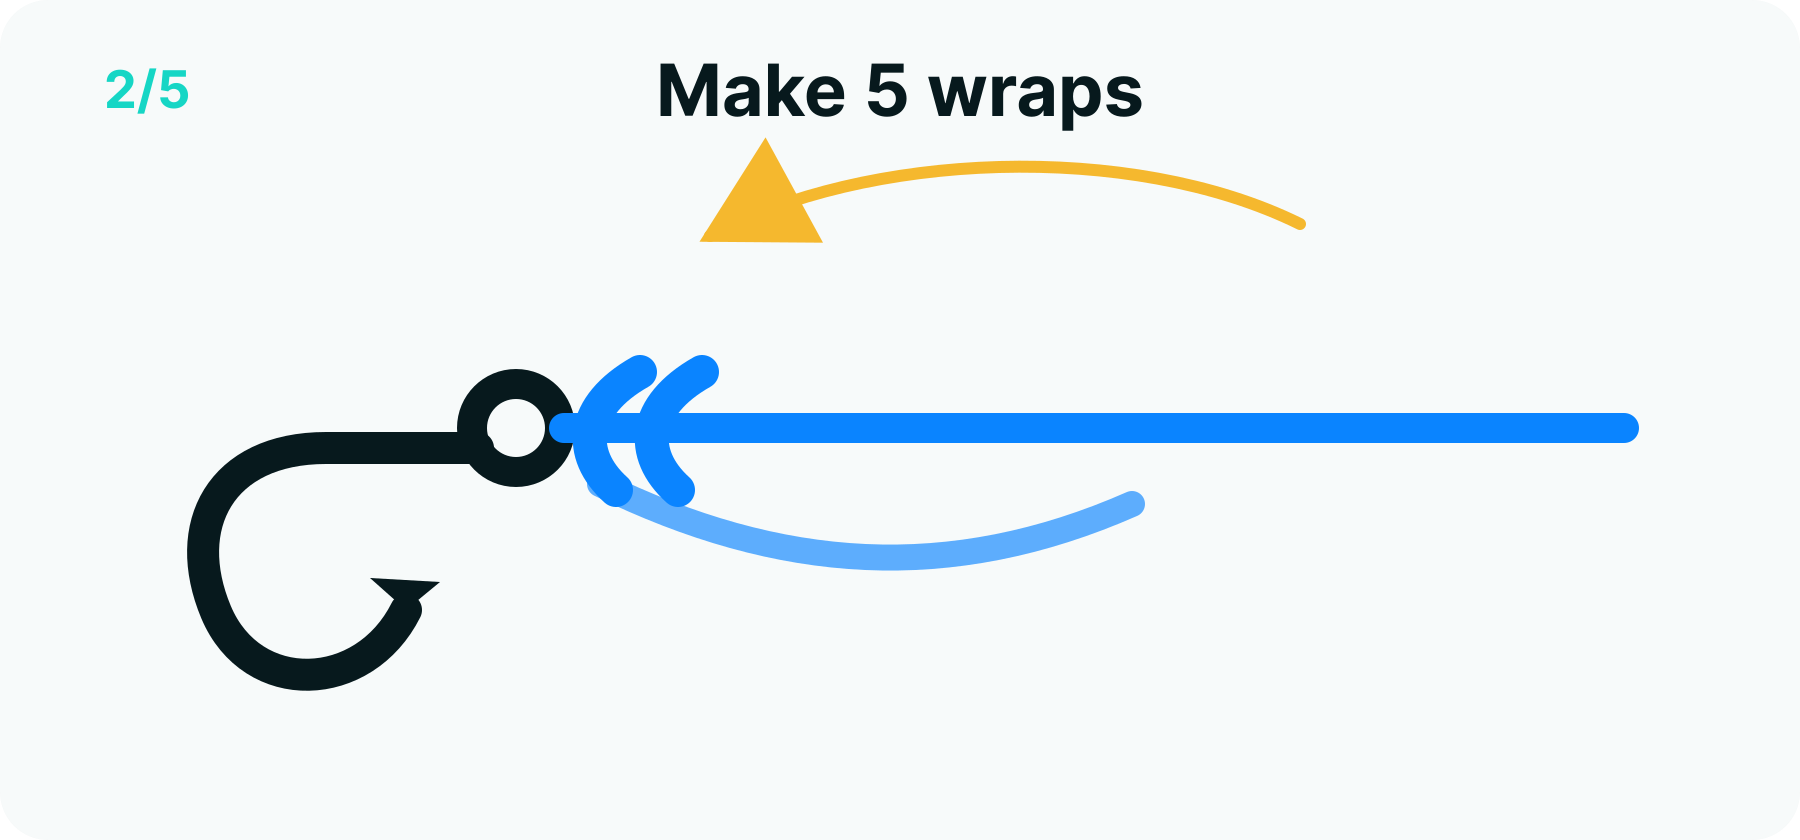 Step 2 of 5
Make 5 wraps
Wrap the tag end around the standing line five times, working away from the eye. Keep the wraps snug and parallel — a neat spiral, never overlapping.
-
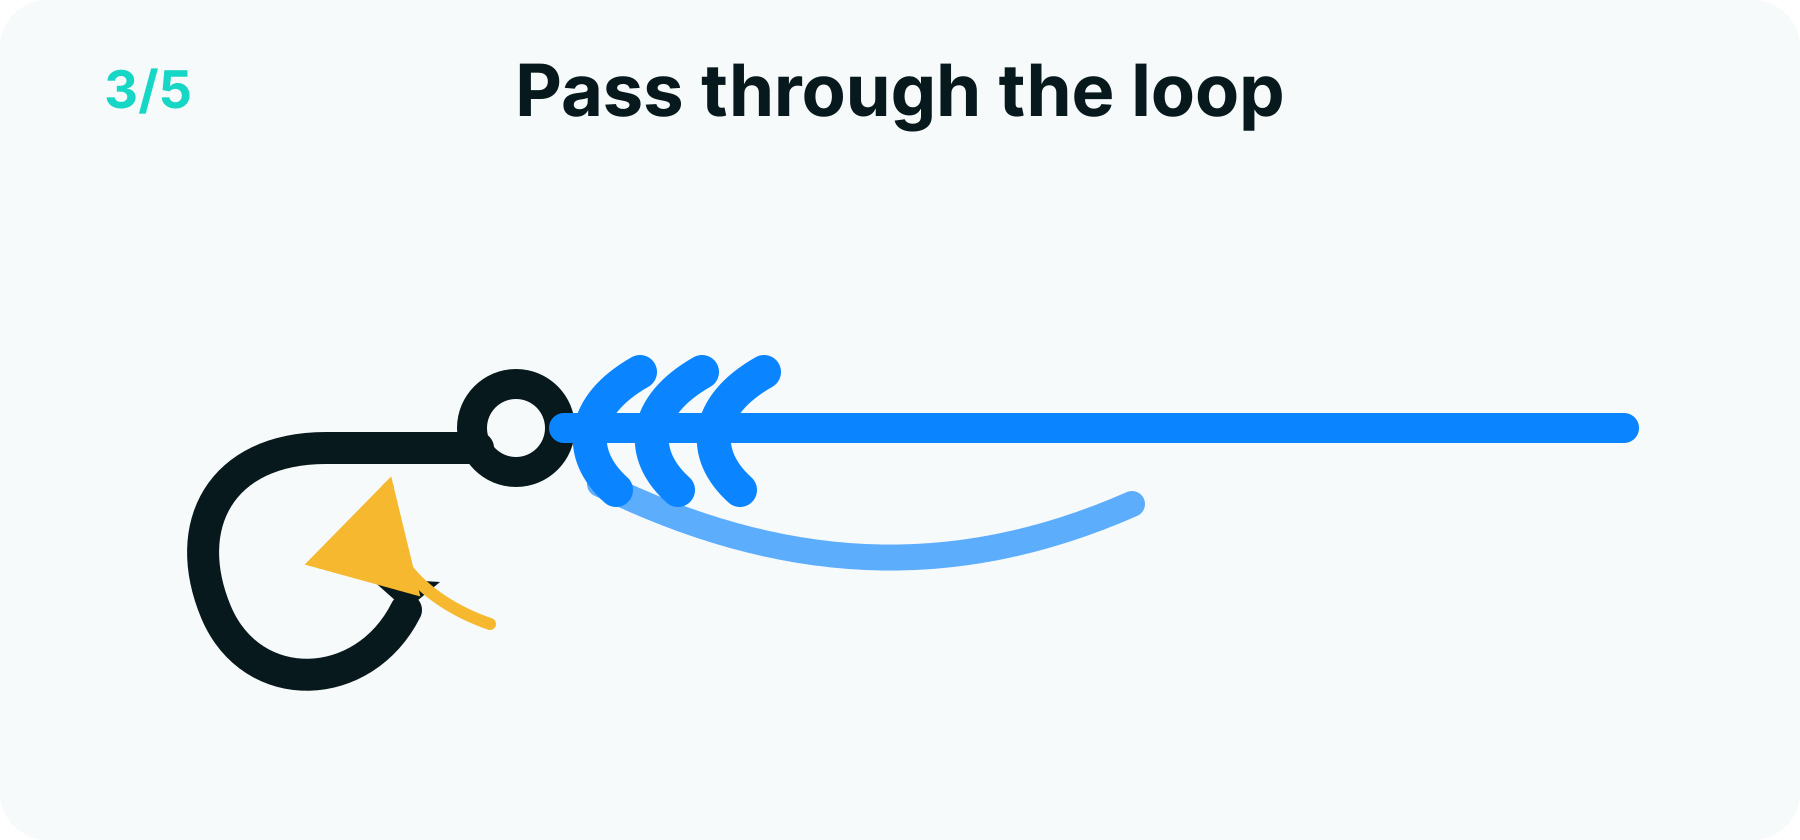 Step 3 of 5
Pass through the loop
Bring the tag end back and push it through the small loop that sits just above the eye — the gap between the eye and the first wrap. Keep the loop open.
-
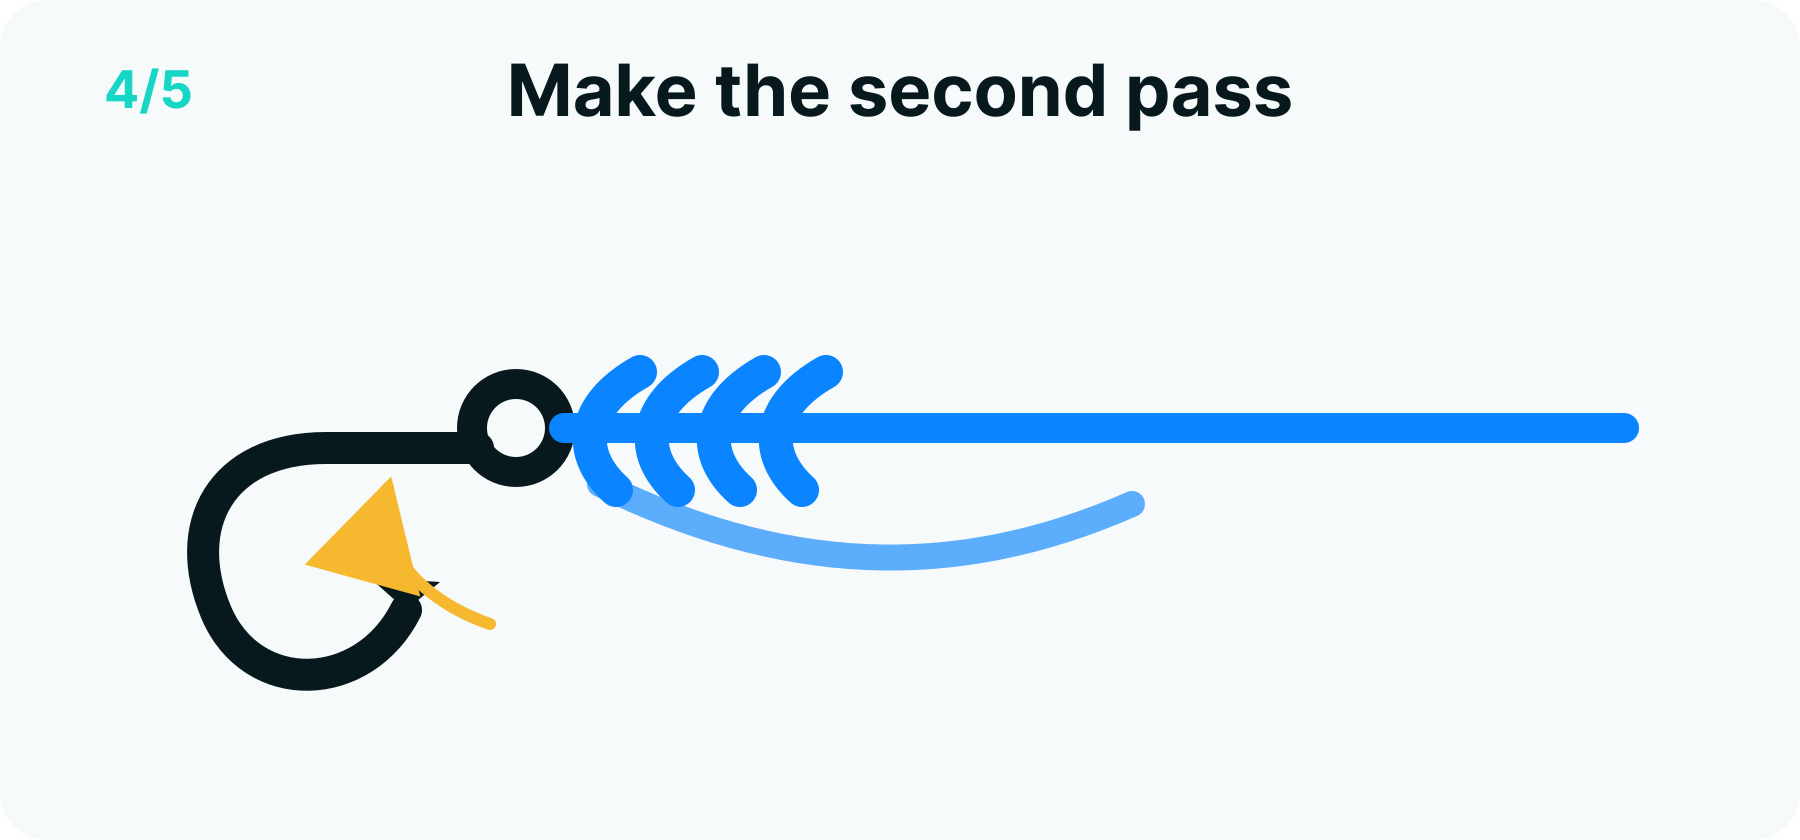 Step 4 of 5
Make the second pass
Now pass the tag through the big loose loop you just created alongside the wraps. This second tuck is the 'improved' part — it traps the tag under the knot.
-
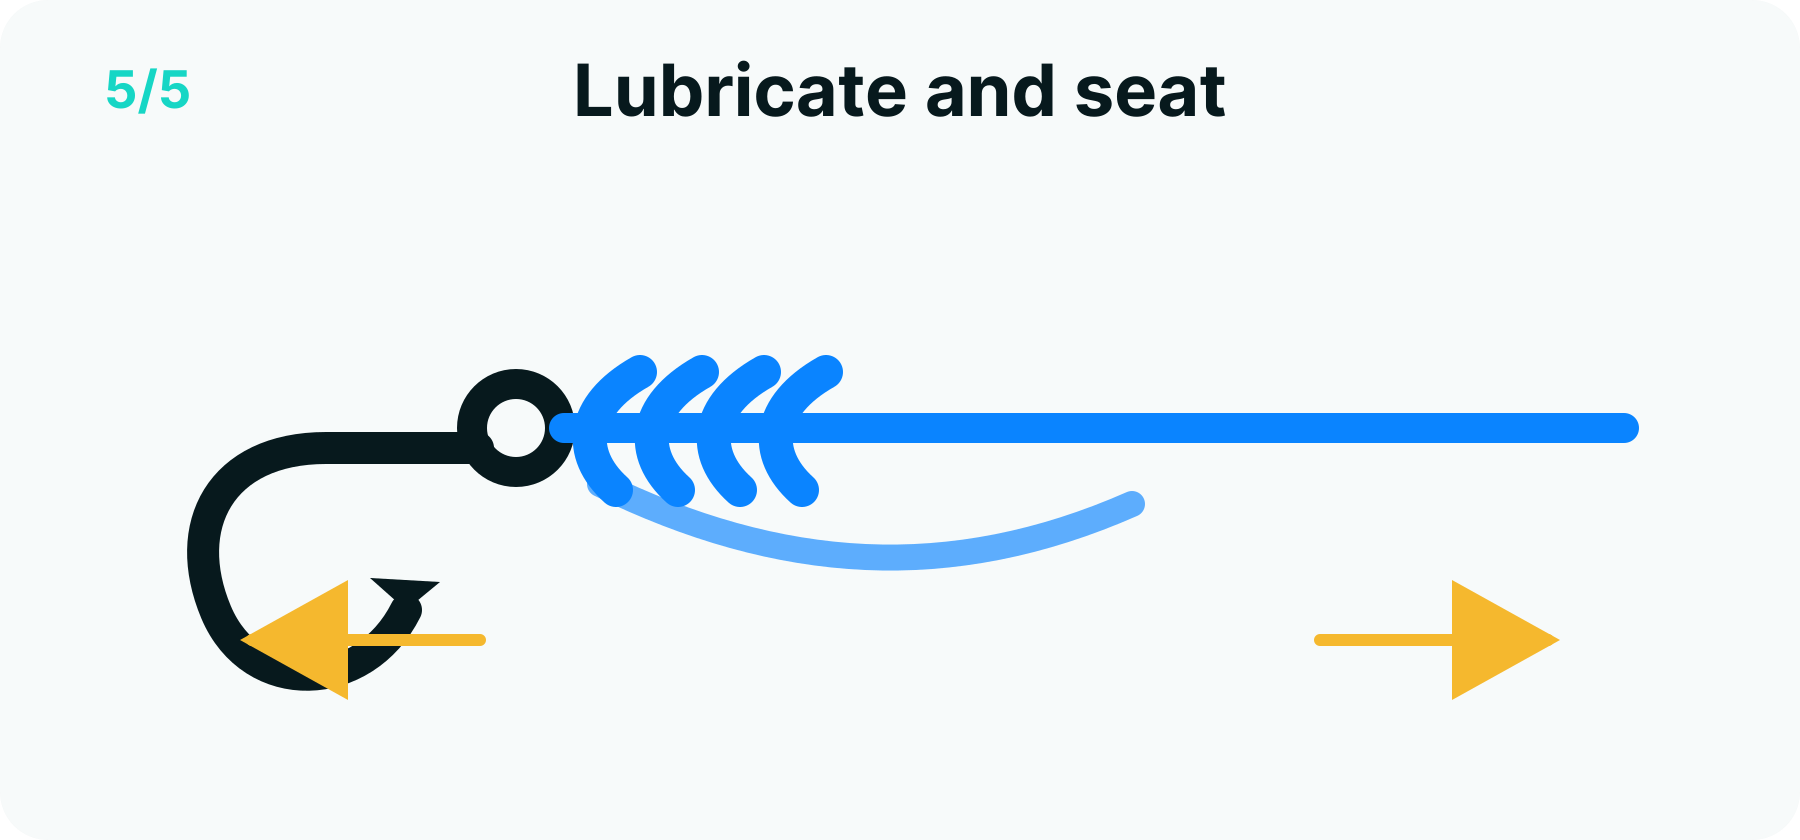 Step 5 of 5
Lubricate and seat
Moisten the knot, then pull the standing line steadily so the wraps spiral down and seat against the eye. Snug the tag gently, check the coils are neat, and trim.
Same steps, animated and in your pocket: the knot guide inside the Fishing Club AI app walks you through every tie hands-free. Get the app.
The default knot, and why it earned the job
Ask a room of anglers which knot they tied first and the clinch family wins by a landslide. The improved clinch is the version that stuck: quick enough to tie with wet hands, strong enough for everyday fishing, and forgiving enough that a slightly imperfect one still holds most fish. It is the standard terminal connection for monofilament and fluorocarbon — line to hook, line to lure, line to swivel — and the knot against which beginners measure everything they learn afterwards.
Its mechanics are worth understanding, because they explain both its strength and its limits. The knot holds by friction: five wraps of line squeezed into a spiral around the standing line, cinched down against the eye. The “improved” part — the second pass of the tag through the large loop — adds a lock. Under load, the wraps grip harder and the trapped tag has nowhere to go. A plain clinch knot works on the same principle minus the lock, which is exactly why the improved version replaced it as the default recommendation.
Where it excels, and the one place it doesn’t
With nylon monofilament and fluorocarbon, the improved clinch is in its element. Both materials have enough surface grip and just enough stretch for the wraps to bed in and stay put. It handles the line weights most freshwater and inshore anglers use daily, from panfish tackle to bass gear, and it ties fast enough that retying after a fish — which you should do — costs nothing.
Braided line is the honest caveat. Braid is thin for its strength and slick-coated, and a knot that lives on friction has less to work with there — line manufacturers themselves caution that clinch-style knots can pull loose on braid, even as some agencies list the improved clinch as serviceable across all line types. Rather than argue the margin, change knots. The Palomar, with its doubled-line geometry, and the uni knot, with its locking collar, are both better matches for braid. Knowing which knot not to use is half of knot craft — our knots hub sorts every guide by job for exactly that reason.
Heavy line is the other boundary. Past roughly the weight of stout leader material, five wraps refuse to seat into a clean spiral no matter how hard you pull. If the coils stand proud and stack unevenly after seating, the line is telling you it wants fewer wraps — or a different knot entirely.
The mistakes that actually cost fish
Watch an improved clinch fail and it is almost never the knot’s design — it is one of four tying errors, all visible before the first cast if you look.
Tightening it dry. Drawing the wraps down without moistening them generates friction heat in the milliseconds of the pull, and that heat damages the line exactly where it can least afford it. Saliva or lake water, then pull. This single habit — moisten every knot, always — is the cheapest strength upgrade in fishing.
Crossed wraps. The five turns should lie beside each other like a spring. If one crosses over another, the strands bite into each other under load instead of sharing it. If the finished knot looks lumpy rather than like a neat barrel, cut it off and retie — thirty seconds against a lost fish.
Pulling the tag to seat it. The knot seats correctly when you pull the standing line, letting the spiral slide down and stack against the eye. Hauling on the tag end distorts the geometry before it ever loads up.
Trimming blind — or never retying. Leave about an eighth of an inch of tag; flush cuts invite slip. And treat every knot as a consumable: after a big fish, a snag, or an afternoon of casting, the knot has absorbed shocks and abrasion you cannot see. The anglers who “never get broken off” are mostly the ones who retie the most.
Fitting it into your system
A practical way to think about knots is as a small toolkit where each tool has one job. The improved clinch is the terminal knot for mono and fluoro — the workhorse for tying on hooks and lures for bass, trout and panfish alike. The arbor knot puts line on the reel. The double uni or blood knot joins two lines. Learn the improved clinch to the point where your hands tie it without your eyes, and it will cover more of your fishing than any other single knot — and when the diagram above isn’t handy, the animated version lives in the Fishing Club AI app’s knot guide, one thumb-tap from the water.
Frequently asked questions
What is the difference between a clinch knot and an improved clinch knot?
One extra pass. Both start the same way — through the eye, wraps around the standing line, tag back through the small loop at the eye. The improved version then sends the tag through the large loop that the first pass created, trapping the tag end under the knot when it is drawn tight. That second tuck is cheap insurance: it converts the knot's main failure mode, the tag slipping back through, into a dead end.
How many wraps should an improved clinch knot have?
Five is the standard taught for everyday line weights, and it is what our diagrams show. Illinois' Department of Natural Resources scales it precisely: six turns with light line (2-6 lb), five with medium (8-12 lb), four with heavy (14-20 lb). The logic runs both directions — too few wraps and there is not enough friction surface, so the knot slips; too many and the wraps cannot all seat evenly, leaving loose coils that work against each other.
Why does my improved clinch knot keep breaking?
The usual suspects, in order: it was drawn tight dry (friction heat weakens the line right at the knot — always moisten first); the wraps crossed over each other instead of spiraling neatly (they cut into each other under load); or the tag was pulled instead of the standing line while seating, which deforms the spiral. Retie after every strong fish and every snag — a knot that has been shock-loaded once is not the knot you tied.
Is the improved clinch knot good for braided line?
Agencies differ slightly, which is worth knowing. Utah's wildlife agency lists it as working with all line types including braid, while Take Me Fishing frames it as best suited to lines up to 20-pound test — light-tackle territory. The mechanical caution: clinch-style knots hold by friction between wraps, and braid's slick coating gives friction less to work with, which is why line manufacturers warn these knots can pull loose on braid. Our practical advice: for braid to a hook or lure, prefer a Palomar or uni; keep the improved clinch for the mono and fluoro it was built around.
What is the improved clinch knot best used for?
Tying mono or fluorocarbon directly to a hook, lure, snap or swivel — the everyday terminal connection, and for many anglers the first fishing knot they ever learn. It is quick to tie with cold fingers, easy to inspect, and works across the line weights most freshwater and inshore anglers actually fish. Pair it with an arbor knot on the spool and a uni or Palomar for braid, and the basics are covered.
Sources
- Improved Clinch Knot: Fishing Knot Tying Steps — Take Me Fishing (Recreational Boating & Fishing Foundation). Accessed August 12, 2026.
- Best Fishing Knots — Take Me Fishing (Recreational Boating & Fishing Foundation). Accessed August 12, 2026.
- Knots Every Angler Should Know — Iowa Department of Natural Resources. Accessed August 12, 2026.
- Knot-Tying Guide — Illinois Department of Natural Resources. Accessed August 12, 2026.
- Knot Tying Lesson Plan, I FISH NY Program — New York State Department of Environmental Conservation. Accessed August 12, 2026.
- Fish Texas: knot tying for the beginning angler — Texas Parks & Wildlife Department. Accessed August 12, 2026.
- Learn to fish: tying the knot — Utah Division of Wildlife Resources. Accessed August 12, 2026.
How we choose sources: sources policy.
More in this series
Know when it's worth going.
Fishing Club AI turns live weather, pressure and moon data into a simple bite forecast for your spot — so the skills you practise get used on the right day.
Get the App